EARRING SYSTEM
Earring System
Bringing great power to those who equip them, Earrings arrive in DevilzMu with the purpose of adding a new build-oriented dynamic to PvP, while also providing a new end-game path for the continent. Initially, two earrings will be released: Earring of Wrath (initial) and Earring of Forefathers (evolution), with the goal of releasing more earrings in the future.
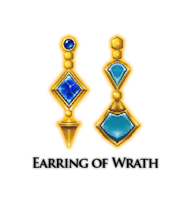


Obtaining the Earring of Wrath
To obtain the Earring of Wrath, first you must purchase the Casting Mold of Wrath item from the X Shop (X key on PC or the mobile options menu), in the DVZ Points section. This will be the base ingredient for creating the Earring.
 |
|---|
| Casting Mold of Wrath |
After that, go to the Chaos Machine in Noria.
 |
|---|
| Noria, Chaos Machine (180, 100) |
To create the Earring of Wrath in the Chaos Machine, choose the first option, Regular Combination, and insert the ingredients below:
| QUANTITY | ITEM |
|---|---|
| 1 | Casting Mold of Wrath |
| 10 | Jewel of Chaos Bundle +3 (30 units) |
| 10 | Jewel of Bless Bundle +3 (30 units) |
| 4 | Jewel of Soul Bundle +3 (30 units) |
| 4 | Jewel of Life Bundle +3 (30 units) |
| 50.000 | DVZ Points (automatically debited from the account) |
| 1 | Casting Mold Luck (optional) |
To increase the success chance of the creation, you can use a Casting Mold Luck.
 |
|---|
| Casting Mold Luck |
You can purchase a Casting Mold Luck from our X Shop (X key on PC or the mobile options menu), in the DVZ Coins section. After that, simply insert it together with the combination ingredients and the success chance will be increased by +30%.
In case of success, you will receive 1x (one) Earring of Wrath +0 (right or left) with random options (1~3).
In case of failure, all items in the Chaos Machine will be consumed, without exceptions.
Evolving the Earring of Wrath to Forefathers
To evolve the TIER of your Earring from "Earring of Wrath" to "Earring of Forefathers", you will need a Casting Mold of Forefathers.
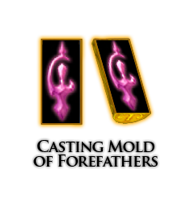 |
|---|
| Casting Mold of Forefathers |
After obtaining the Casting Mold of Forefathers, go to the Chaos Machine in Noria and choose the first option (Regular Combination). There, you will need the following ingredients:
| QUANTITY | ITEM |
|---|---|
| 1 | Earring of Wrath (+11 to +13) |
| 1 | Casting Mold of Forefathers |
| 10 | Jewel of Chaos Bundle +3 (30 units) |
| 10 | Jewel of Bless Bundle +3 (30 units) |
| 4 | Jewel of Soul Bundle +3 (30 units) |
| 3 | Jewel of Life Bundle +3 (30 units) |
| 100.000 | DVZ Points (automatically debited from the account) |
| 1 | Casting Mold Luck (optional) |
The success chance may vary if you use Casting Mold Luck in the combination!
In case of success, you will receive 1x (one) Earring of Forefathers +0 with the same side characteristic as the previous one (right or left) and random options.
In case of failure, all items will be consumed, except the Earring of Wrath, which will be kept with the same options, but with its level returned to +0.
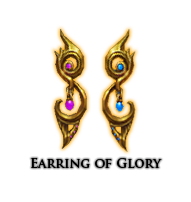
Evolving the Earring of Forefathers to Glory
To evolve the TIER of your Earring from "Earring of Forefathers" to "Earring of Glory", you will need a Casting Mold of Glory.
 |
|---|
| Casting Mold of Glory |
After obtaining the Casting Mold of Glory, go to the Chaos Machine in Noria and choose the first option (Regular Combination). There, you will need the following ingredients:
| QUANTITY | ITEM |
|---|---|
| 1 | Earring of Forefathers (+11 to +13) |
| 1 | Casting Mold of Glory |
| 10 | Jewel of Chaos Bundle +3 (30 units) |
| 10 | Jewel of Bless Bundle +3 (30 units) |
| 4 | Jewel of Soul Bundle +3 (30 units) |
| 3 | Jewel of Life Bundle +3 (30 units) |
| 250.000 | DVZ Points (automatically debited from the account) |
| 1 | Casting Mold Luck (optional) |
The success chance may vary if you use Casting Mold Luck in the combination!
In case of success, you will receive 1x (one) Earring of Glory +0 with the same side characteristic as the previous one (right or left) and random options.
In case of failure, all items will be consumed, except the Earring of Forefathers, which will be kept with the same options, but with its level returned to +0.
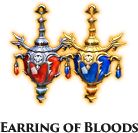
Evolving the Earring of Glory to Bloods
To evolve the TIER of your Earring from "Earring of Glory" to "Earring of Bloods", you will need a Casting Mold of Blood.
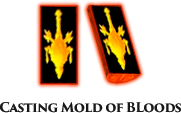 |
|---|
| Casting Mold of Blood |
After obtaining the Casting Mold of Blood, go to the Chaos Machine in Noria and choose the first option (Regular Combination). There, you will need the following ingredients:
| QUANTITY | ITEM |
|---|---|
| 1 | Earring of Glory +13 (OR) +15 (+15 keeps the same Glory options and bonus, only turning into Bloods in case of success) |
| 1 | Casting Mold of Blood |
| 1 | Jewel of Chaos (Bundle 500 units) |
| 1 | Jewel of Bless (Bundle 500 units) |
| 1 | Jewel of Soul (Bundle 500 units) |
| 1 | Jewel of Life (Bundle 500 units) |
| 1 | Jewel of Creation (Bundle 500 units) |
| 500.000 | DVZ Points (automatically debited from the account) |
| 1 | Casting Mold Luck (optional) |
The success chance may vary if you use Casting Mold Luck in the combination!
In case of success, you will receive 1x (one) Earring of Bloods +0 with the same side characteristic as the previous one (right or left) and random options in case of +13, or the same Glory options/bonus in case of +15.
In case of failure, all items will be consumed, except the Earring of Glory, which will be kept with the same options, but with its level returned to +0.
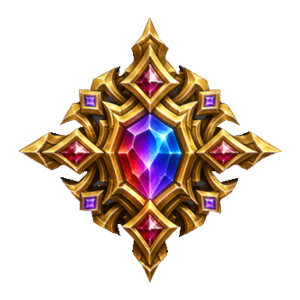
Earring of Allurement
As the natural evolution of the earring line, the Earring of Allurement arrives in DevilzMu as the highest tier currently available on the server. Following the Wrath → Forefathers → Glory → Bloods progression, Allurement represents the peak of the Earring system, bringing even more expressive values to opponent attribute reduction options — therefore making it the most coveted piece for end-game PvP builds.
The Earring of Allurement follows the same pattern as the other earrings, being composed of a left version (red jewel) and a right version (blue jewel), which must be equipped together for the additional bonuses to be activated.
| |
|---|---|
| Earring of Allurement (Left) | Earring of Allurement (Right) |
The only way to obtain the Earring of Allurement is through the Mystic Earring Box, available in our promotions and special events. For more details on how the system works, see section Mystic Earring Box.
The level evolution system (Lapidary Stone), bonus system (Casting Mold Attack/Defense), and the 4th Option described in the other sections of this guide also apply to the Earring of Allurement, with the note that its option values will be higher than those of the previous tiers.
Earring Bonus System
You can improve your Earrings (both) in the Chaos Machine by combining them with an additional bonus focused on attack or defense. The choice is yours, using either a Casting Mold Attack (attack) or Casting Mold Defense (defense).
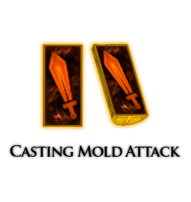 | 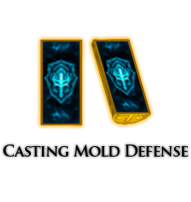 |
|---|---|
| Casting Mold Attack | Casting Mold Defense |
To combine the additional bonus with your Earrings, go to the Chaos Machine in Noria, choose the first option (Regular Combination), and place the following combination:
| QUANTITY | ITEM |
|---|---|
| 1 | Casting Mold (defense or attack) |
| 1 | Earring (left) +13 |
| 1 | Earring (right) +13 |
| 9 | Jewel of Chaos Bundle +3 (30 units) |
| 9 | Jewel of Bless Bundle +3 (30 units) |
| 4 | Jewel of Soul Bundle +3 (30 units) |
| 4 | Jewel of Life Bundle +3 (30 units) |
| 250.000 | DVZ Points (automatically debited from the account) |
| 1 | Casting Mold Luck (optional) |
* For the combination to work correctly, both earrings must be of the same type, level, and have the same number of options.
You can increase the combination success chance by +30% when using a Casting Mold Luck.
In case of success, 1x (one) random additional bonus will be activated on the Earrings according to the Casting Mold used in the combination.
In case of failure, all ingredients are consumed, except the Earrings.
- The additional bonus will be activated only when you equip both Earrings; otherwise, the additional bonus will not be activated.
- When using a pair of different Earrings, even if both have the same additional bonus, they will not be activated.
Available Options
Below are all the options available for the game's current earring system. As a reminder, according to item II, which covers Earring creation, options may come randomly in a quantity of (1 to 3).
Option values on the LEFT side will always be WHOLE NUMBERS, and on the RIGHT side they will be PERCENTAGES.
The values of the Earring of Glory will be higher than those of the Earring of Forefathers, which in turn will be higher than those of the Earring of Wrath.
Standard Options
| STANDARD OPTIONS |
|---|
| Decrease Opponent's Damage (Strength) |
| Decrease Opponent's Damage (Agility) |
| Decrease Opponent's Damage (Vitality) |
| Decrease Opponent's Damage (Energy) |
| Decrease Opponent's Damage (Command) |
| Decrease Opponent's Defense (Strength) |
| Decrease Opponent's Defense (Agility) |
| Decrease Opponent's Defense (Vitality) |
| Decrease Opponent's Defense (Energy) |
| Decrease Opponent's Defense (Command) |
| Decrease Opponent's Successful Blocking |
| Decrease Opponent's Life |
| Decrease Opponent's Mana |
| Decrease Opponent's AG |
| Decrease Opponent's SD |
| Decrease Opponent's Critical Damage |
| Decrease Opponent's Critical Damage Rate |
| Decrease Opponent's Excellent Damage |
| Decrease Opponent's Excellent Damage Rate |
| Decrease Opponent's Skill Damage |
| Decrease Opponent's Mana Shield Buff |
Bonus Options
| BONUS OPTIONS |
|---|
| Reduce Opponent's Damage (Strength) |
| Reduce Opponent's Damage (Agility) |
| Reduce Opponent's Damage (Vitality) |
| Reduce Opponent's Damage (Energy) |
| Reduce Opponent's Damage (Command) |
| Reduce Opponent's Defense (Strength) |
| Reduce Opponent's Defense (Agility) |
| Reduce Opponent's Defense (Vitality) |
| Reduce Opponent's Defense (Energy) |
| Reduce Opponent's Defense (Command) |
4th Option
It is possible to integrate an exclusive option into the Earring. This 4th option works as an instant decrease in the opposing character's attributes in real time. This addition aims not only to improve the Earring system, but also to allow the creation of customized builds adapted to face specific classes.
To unlock the 4th option, simply purchase an Earring Jewelry: 4th Option from DevilzMu Shop X and use it on the desired Earring (just like other Jewels, such as Bless and Soul, for example).
 |
|---|
| Earring Jewelry: 4th Option |
The success chance for activating the 4th option is 100%. The option is random, and the values of each one may vary depending on which Earring evolution it was activated on, with the Earring of Glory being the strongest.
You can use as many Earring Jewelry: 4th Option items as you want on the same Earring (even with it already active), until you obtain the desired option.
Option values on the LEFT side will always be WHOLE NUMBERS, and on the RIGHT side they will be PERCENTAGES.
List of options available for use as the 4th Option
| 4th OPTION |
|---|
| Reduce Opponent's Strength |
| Reduce Opponent's Agility |
| Reduce Opponent's Vitality |
| Reduce Opponent's Energy |
| Reduce Opponent's Command |
These options take immediate effect on your opponent. In other words, during a possible confrontation, if they check the character's attributes, it will be possible to see this decrease.
Evolving the Earring Level
The earring level only affects the values of the standard options (white), which correspond to base attack and base defense attributes. The values of the blue options are defined by the earring "type" (tier), not by its level.
In DevilzMu, there are two ways to evolve the level of an Earring, each with different rules, risks, and ranges:
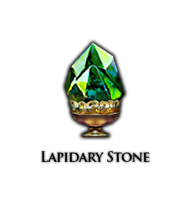
Lapidary Stone
The Lapidary Stone is the traditional way to evolve the earring level, and must be placed directly on top of the item, as is done with the other jewels (Jewel of Bless | Jewel of Soul).
 |
|---|
| Lapidary Stone |
The Lapidary Stone can be obtained through the following combination in the Chaos Machine, using the first option (Regular Combination):
| QUANTITY | ITEM |
|---|---|
| 3 | Excellent Item with 3 options +13 |
| 2 | Jewel of Chaos Bundle +3 (30 units) |
| 2 | Jewel of Bless Bundle +3 (30 units) |
| 2 | Jewel of Soul Bundle +3 (30 units) |
| 2 | Jewel of Life Bundle +3 (30 units) |
| 10.000 | DVZ Points (automatically debited from the account) |
In case of success, you will receive 1x (one) Lapidary Stone.
In case of failure, all ingredients are consumed.
The level evolution of Earrings when dropping a Lapidary Stone on them has a variable failure chance depending on the item level. See the failure consequences below:
| ITEM LEVEL | FAILURE CONSEQUENCE |
|---|---|
| +1 to +6 | Loses 1 Earring level |
| +7 to +9 | Loses 2 Earring levels |
| +10 to +13 | The Earring returns to +0 |
In case of success, your Earring will evolve by +1 (one) level.
Earring Jewelry: Ascension
The Earring Jewelry: Ascension is an exclusive jewel for the Earring system, intended for evolving earring levels up to +15, surpassing the limit handled by the Lapidary Stone and offering a safer alternative for end-game earrings.
 |
|---|
| Earring Jewelry: Ascension |
Using the Earring Jewelry: Ascension follows the same pattern as the other jewels in the system (such as Lapidary Stone, Jewel of Bless, and Jewel of Soul): simply drag and drop the jewel directly on top of the Earring you want to evolve.
The success chance when using Earring Jewelry: Ascension is 75%. In case of success, the Earring level is increased by +1.
Unlike Lapidary Stone, when a combination with Earring Jewelry: Ascension fails, the Earring level is NOT reduced. The jewel will be consumed, but your earring will remain at the same level it was before the attempt, making this evolution path much safer for higher levels.
Earring Jewelry: Ascension is the only way to raise the Earring level above the limit reached by Lapidary Stone, allowing earrings to reach the coveted +15.
Mystic Earring Box
The Mystic Earring Box is a special way to obtain Earrings, made available in promotions and special events in DevilzMu. Earrings obtained through the Mystic Earring Box follow a special set of rules that considerably increase the value of the piece, making it one of the most advantageous ways to acquire an Earring on the server.
 |
|---|
| Mystic Earring Box |
Rules for earrings obtained through Mystic Earring Box
- Level: can drop between +0 and +6 (random).
- Standard options: the earring will always come with 3 random options among those available for the tier.
- 4th Option: may or may not come activated on the earring — its presence is determined by chance at the moment of the drop. When it does come, it will have a random option and will not require using an Earring Jewelry: 4th Option.
- Pair bonus: the additional bonus (Attack/Defense) is guaranteed, removing the need for the Chaos Machine combination with Casting Mold Attack/Defense.
The rules above apply exclusively to new earrings obtained directly from the Mystic Earring Box. Earrings obtained by other means — such as creation in the Chaos Machine, tier evolutions, or regular combinations — follow the standard rules described in the other sections of this guide.
-
This topic reflects 100% of the settings currently present on our server.
-
It is important to emphasize that an options system is always complex, and sometimes changes are necessary, whether nerfs, buffs, or new options. Therefore, when creating your build, be aware that it may be changed. However, all changes will always be announced through our social networks and website, and we will update this topic accordingly.
-
Found an error or have a suggestion to help us improve this guide? Send it to us by email at suporte@devilzmu.net